Oracle Database - Flash backTypes of Flashback :
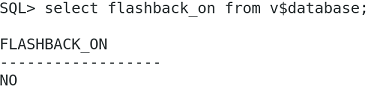 Step 2 : Enable the flashback  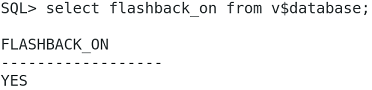 Step 3 : Stop the flashback 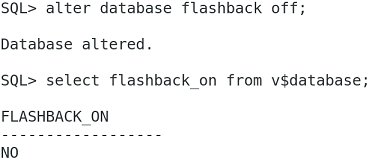 Two methods to take flashback: 1. SCN (System change number) 2. Timestamp Step 1 : To check current scn number 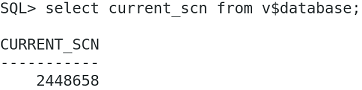 Step 2 : Identify timestamp from scn number 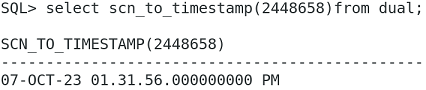 Step 3 : Identify scn number from timestamp  Flashback query:Step 1 : Connect to the user then create a table 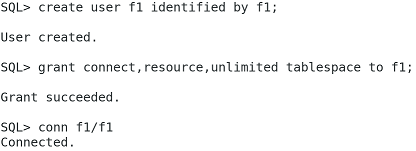  Step 2 : Insert the values to a1 table 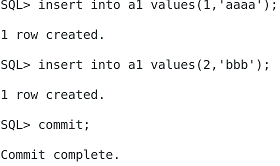 Step 3 : Connect to Sys user to check current scn number 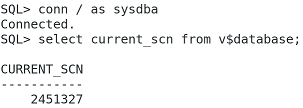 Step 4 : To view data in a1 table  Step 5 : Insert the values to a1 table 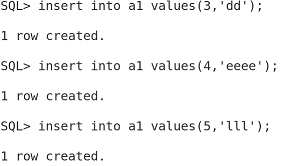 Step 6 : To check current scn number 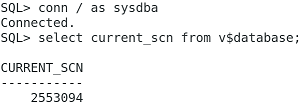 Step 7 : Delete all the values from a1 table 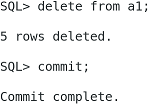 Step 8 : To view old values by using scn method of flashback query  Table recreate as different name by using scn number:Flashback version query:Pseudo columns :Step 1 : To view flashback versions query between two scn numbers 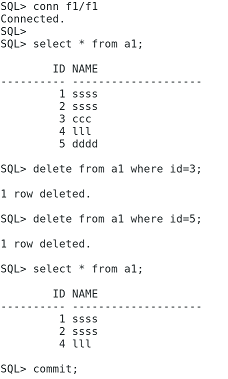 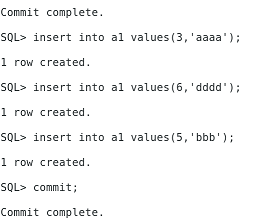 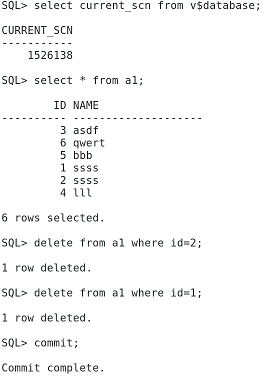 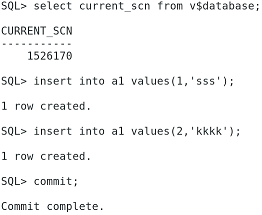 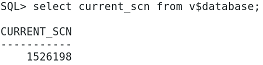  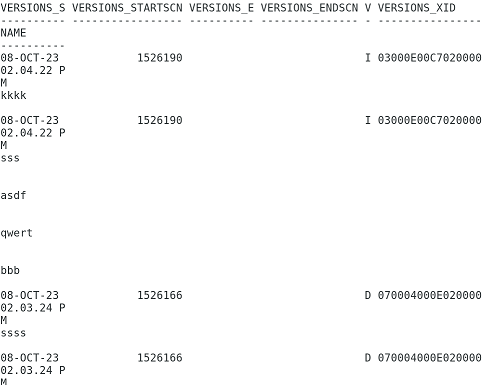 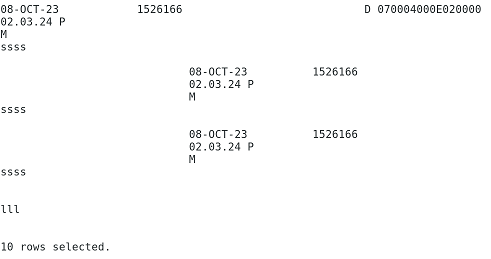 Flashback transaction query:In 12c :Step 1 : To view deleted values from flashback transaction query 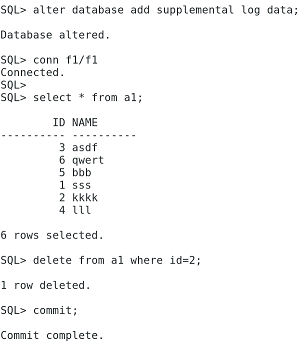 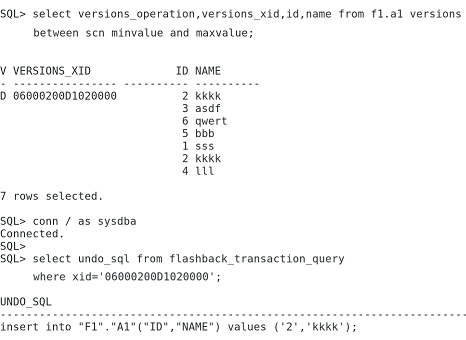 Flashback Table :Step 1 : To create table with f1 user Step 2 : Insert the values to d2 table 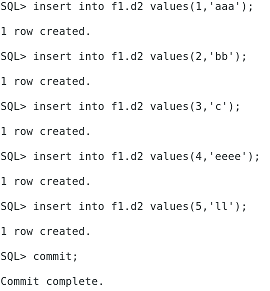 Step 3 : To check current scn number 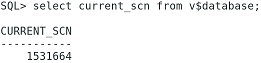 Step 4 : Delete the values in d2 table with f1 user 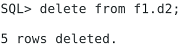 Step 5 : Flashback table by using scn method 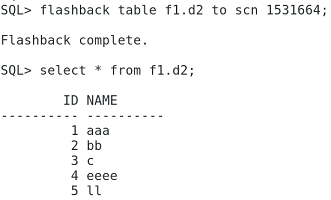 Flashback drop: Step 1 : Drop the table  Step 2 : Create a table  Step 3 : Connect to f1 user then flashback the dropped table 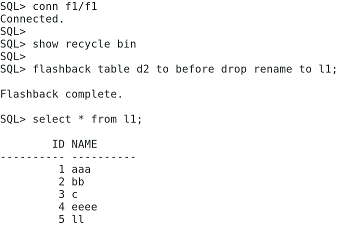 Flashback Database : Step 1 : To enable the flashback 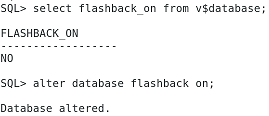 Step 2 : To check current scn number  Step 3 : Connect to user check how many tables in the user  Step 4 : Drop the table in f1 user  Step 5: Connect to sys user & close the database 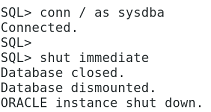 Step 6 : Start the database in mount stage  Step 7 : Flashback the database by using scn number 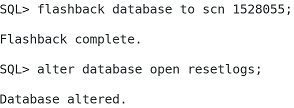 Step 8 : To View Table 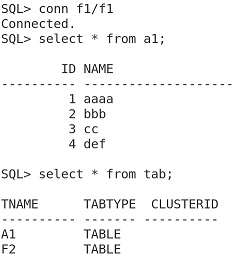 « Previous Next Topic » (Oracle Database - Flash back) |