LINUX INSTALLATION
|
Overview Linux® is an open source operating system (OS). An operating system is the software that directly manages a system’s hardware and resources, like CPU, memory, and storage. The OS sits between applications and hardware and makes the connections between all of your software and the physical resources that do the work. Let us the see the installation of linux OS Step 1: Open virtual box and click on the New button 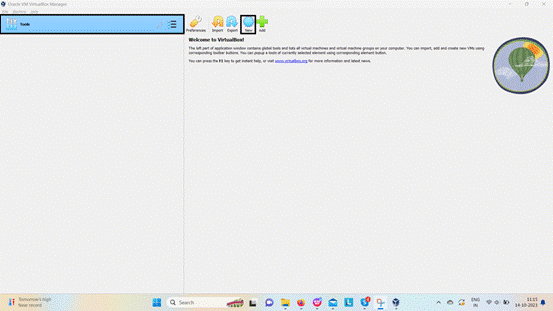
Step 2: Name the machine on VirtualBox. For example, we have given ?TESDB ACADEMY?. Choose the downloaded ISO file--> select linux software 7.9. 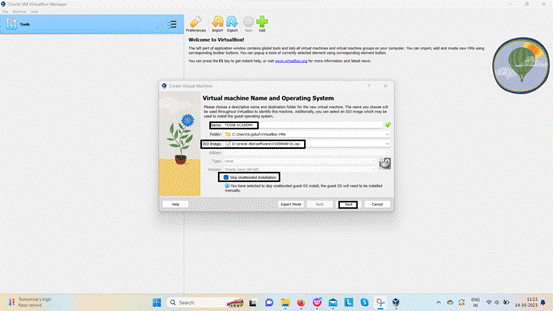
Step 3: Assign the amount of RAM you want to give to your Oracle Virtual machine. The 4GB is recommended for a proper functioning of an Oracle server with GUI interface. 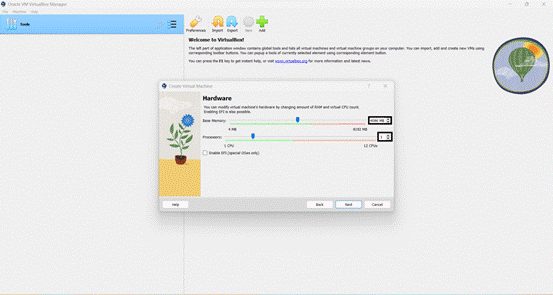
Step 4: Use the slider and set it to least 60GB and then click on Create button to create a VM and click next. 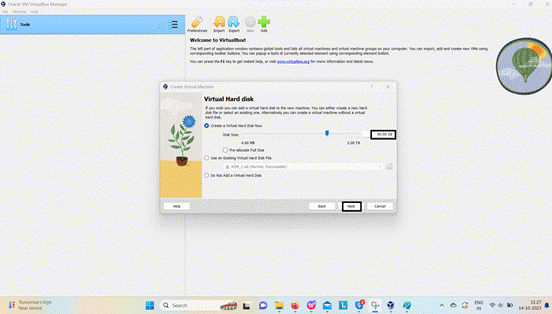
Step 5: Click finish. 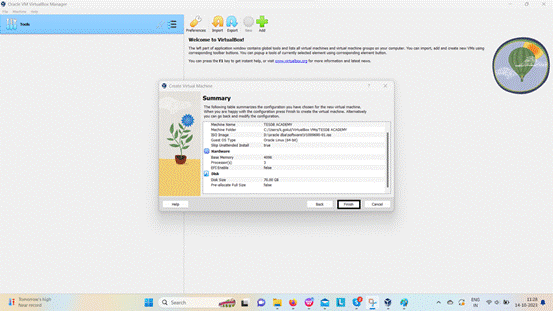
Step 6: Virtual machine is ready and Oracle VM VirtualBox Manager is Displayed. Click on Settings to configure the Virtual Machine. 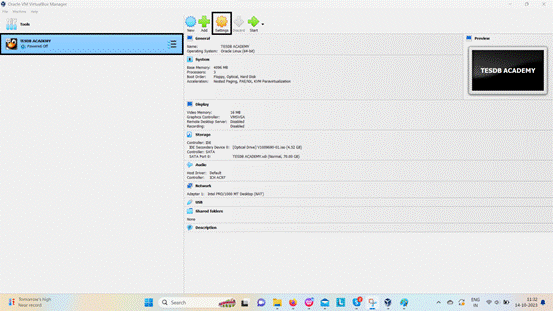
Step 7: Click on General and then Select advanced option. Change the shared clipboard option to ?Bidirectional?. 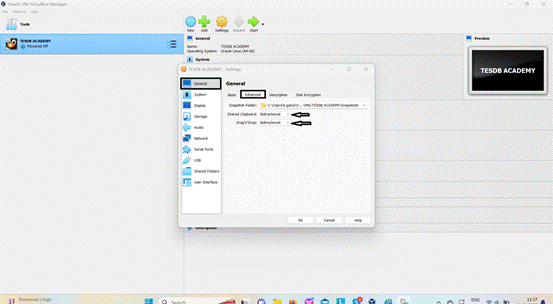
Step 8: Next move to network, in Attached to choose ?Bridged Adapter? and click advanced change promiscuous mode to ?allow all?. 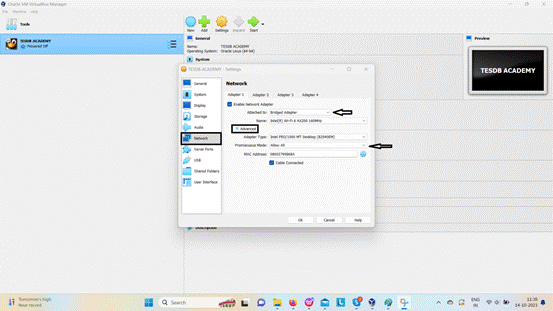
Step 9: Next move to ?shared folders?, Click on the add folder icon. After Clicking add folder icon, Select ?Other? to choose the path of the shared folder. And then select ?Auto-Mount?, Click on the ?OK? button. 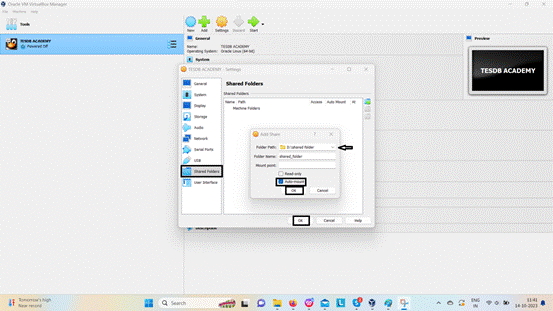
Step 10: Click on start 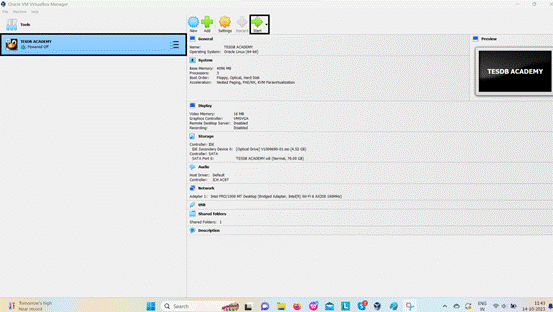
Step 11: The boot screen of this Oracle server will appear. From the keyboard, use the arrow keys and select the first option ?Install Oracle Linux 7.9? 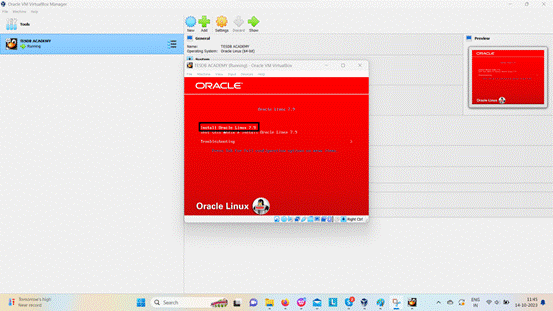
Step 12: Next set the language for your Oracle server operating system. By default it is English. Click on the Continue button. 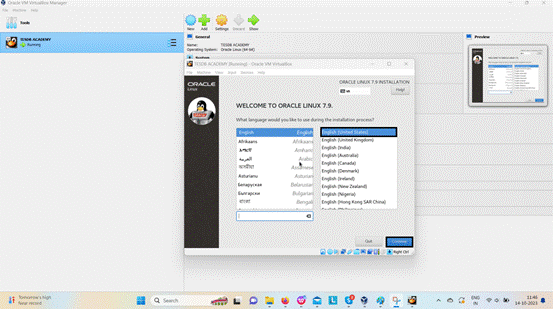
Step 13: Select Data & Time option to set the default system time. 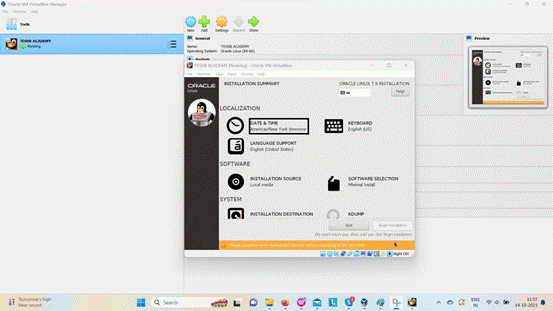
Step 14: Select india location and click done. 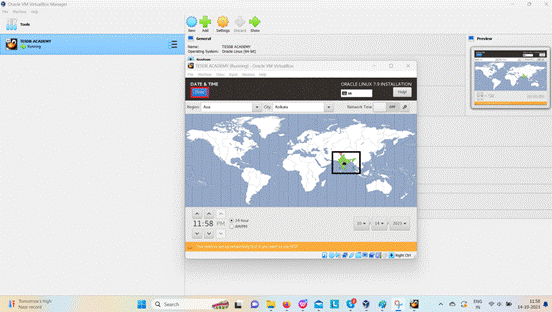
Step 15: Now select , Software Selection. 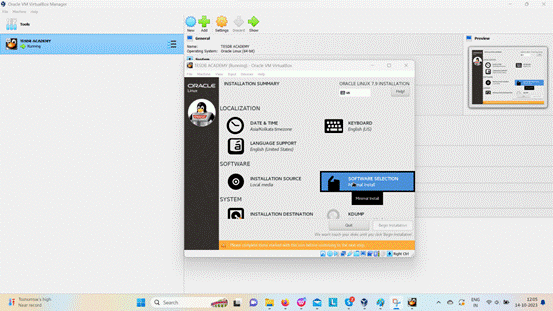
Step 16: Select the Server with GUI and choose the below options 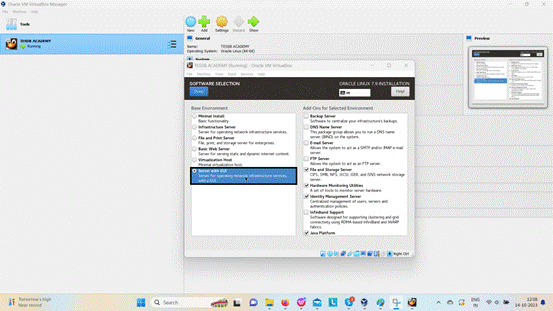
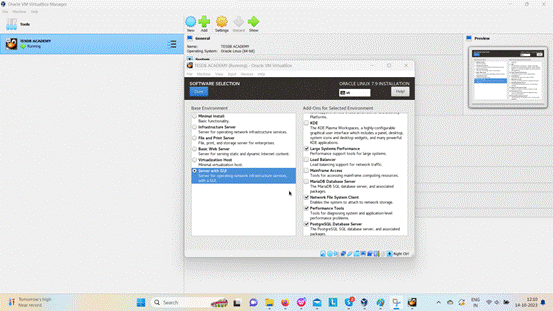
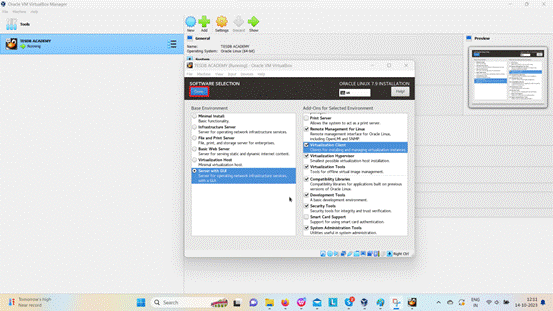
Step 17: Click on the Installation Destination option to set the partition. 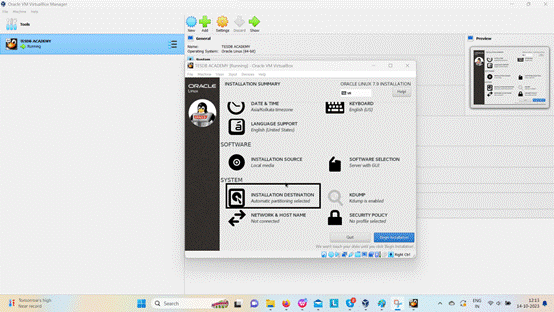
Step 18: Choose ?I will configure partitioning? and click done 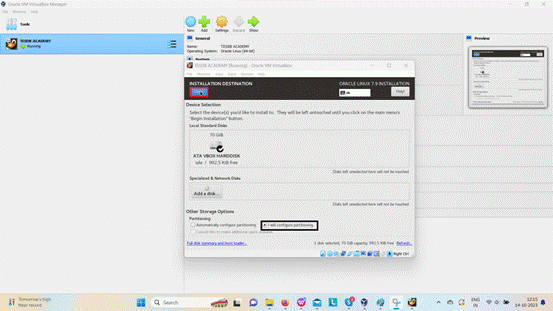
Step 19: Change lvm to standard partition and click ?+? symbol add mount point 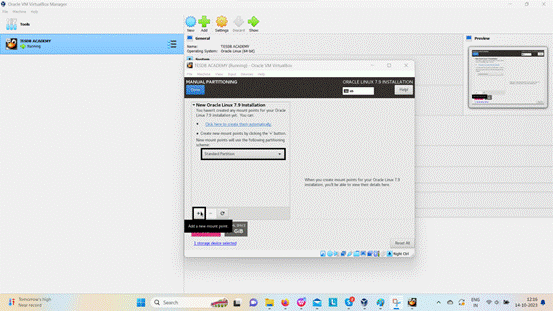
Step 20: Add new mount point : Swap Desired capactiy: 4GB and click add mount point 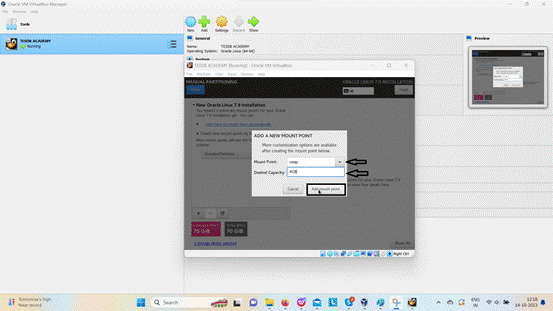
Step 21: Again click ?+? symbol add another mount point 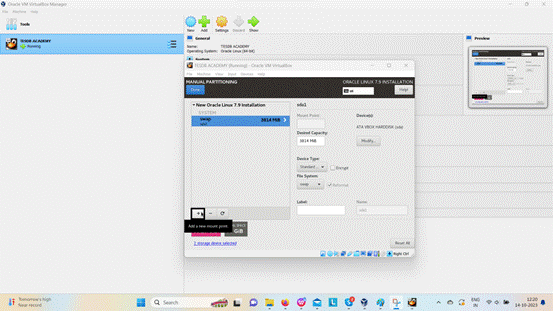
Step 22: Add mount point : / Desired capacity: alocate rem 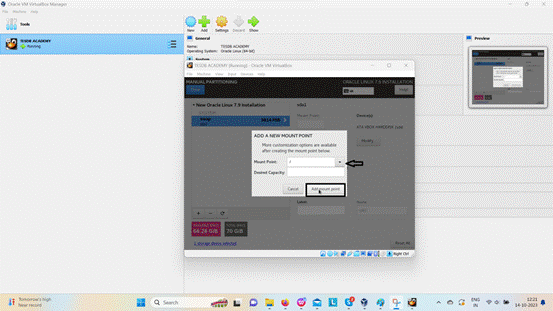
Step 23: Add mount point after click done 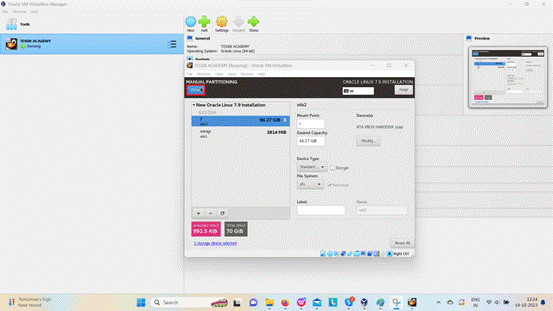
Step 24: Click accept changes 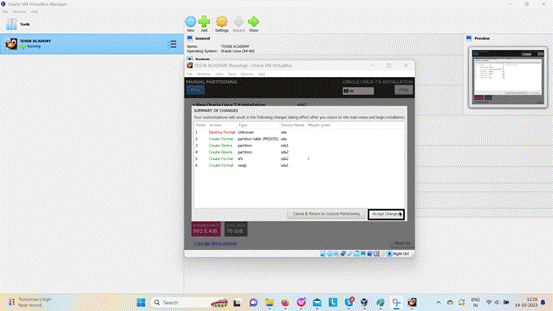
Step 25: Now click on the Network & Hostname option 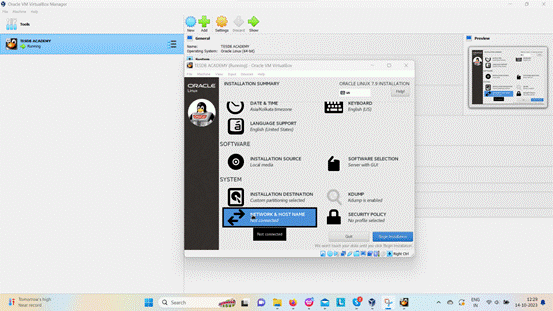
Step 26: Selection and simply use the toggle button turn ON for network configuration to get the internet connection. 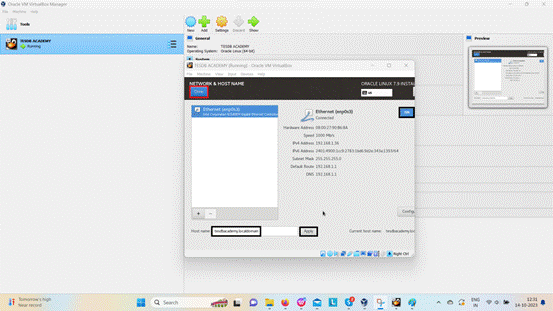
Step 27: All finesh and click begin installer 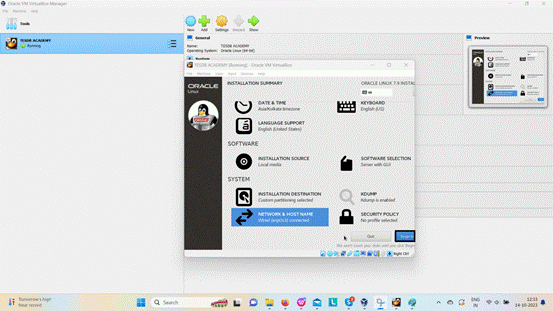
Step 28: Once the root password setup is done. 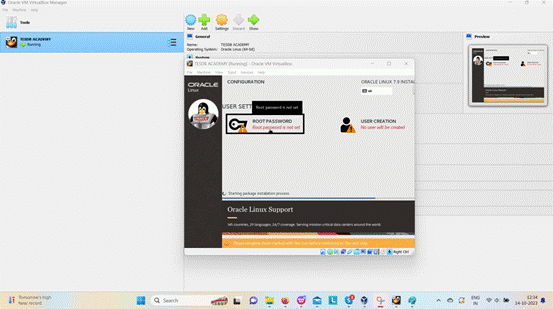
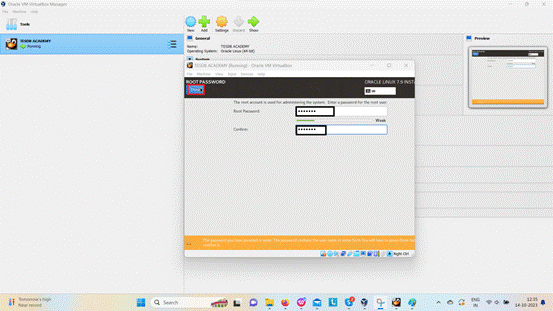
Step 29: Go to the User creation and type the full name of the user you want to create on Oracle server plus username and password you want to assign to that. 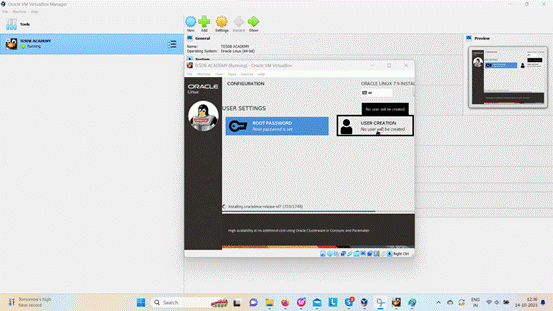 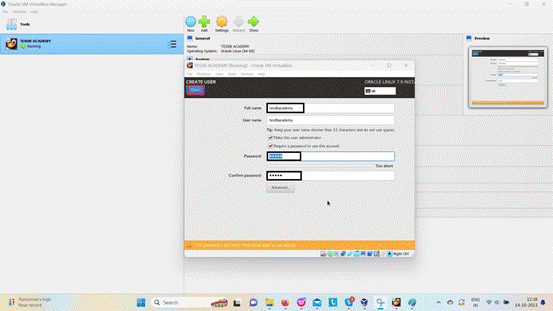
Linux installation done !! |
