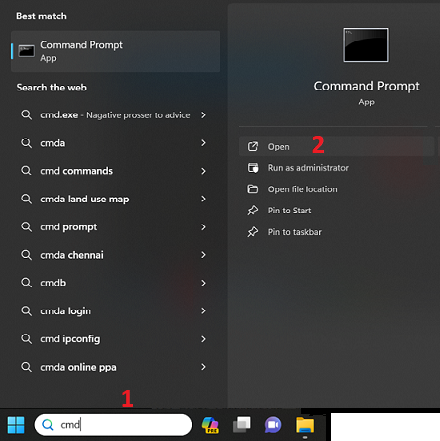
INSTALLATION OF JDKIntroduction :The Java Development Kit (JDK) is a set of software tools for developing Java applications. The toolkit includes a compiler for converting Java code into bytecode, a collection of class libraries, documentation for integrating Java APIs, and the Java Runtime Environment (JDE) for executing Java code. The JDK provides developers the resources they need to create Java applications and applets in one neat package. Find How To Install Java Development Kit on Windows :Check If Java Is Installed : Multiple Java versions on the same system can cause conflicts, as applications may attempt to use different versions. Additionally, outdated versions can pose significant security risks over time. Before installing the latest Java Development Kit, check if a Java version is already installed on Windows:
java -version
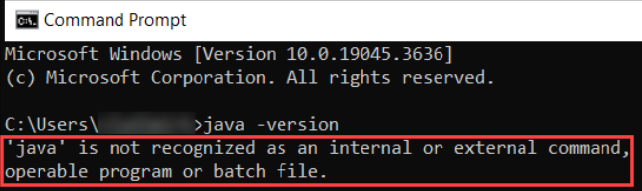 In this example, the message states that Java is not recognized as an internal or external command, which indicates that Java is not installed. If the system displays a Java version number, remove the old Java installation before proceeding. Download Java for Windows :OpenJDK is an open-source project that provides source code for implementing the Java platform. Many companies, including Oracle, offer distributions of OpenJDK in the form of installers or binaries. To download the latest Java Development Kit installation file for Windows:
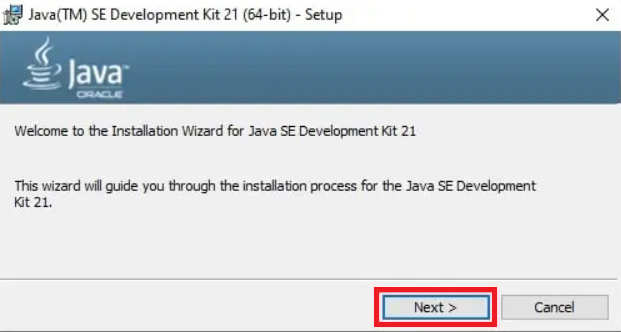
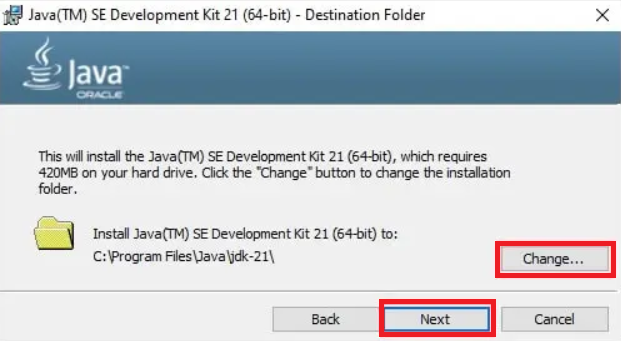
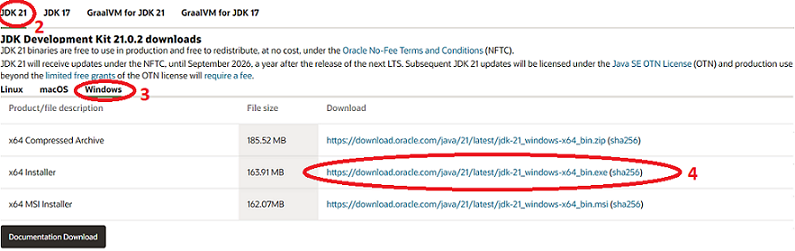 Wait for the download to complete. Install Java on Windows :To install Java on your Windows system :
  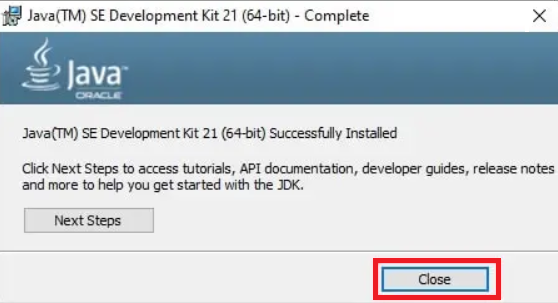 You have successfully installed JDK 21 on your Windows system. To enable program compiling from any directory, you must set up Java environment variables. Set Environmental Variables in Java :Follow the steps in the sections below to configure Java environment variables in Windows. Step 1 : Add Java to System Variables This step ensures that Java is accessible from the command line in any directory.
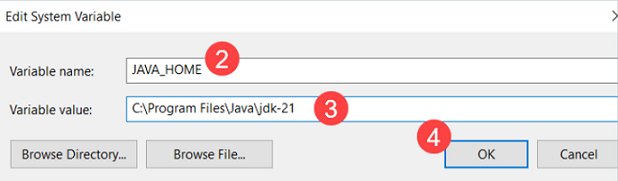
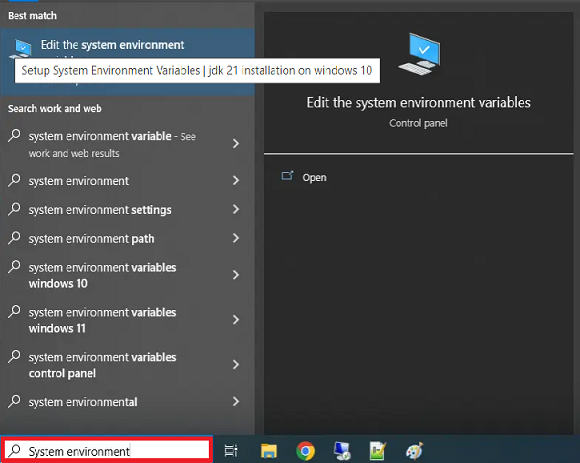 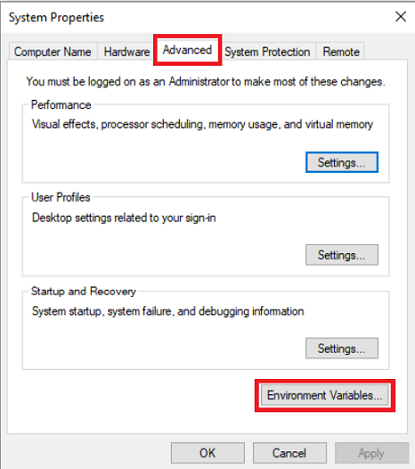 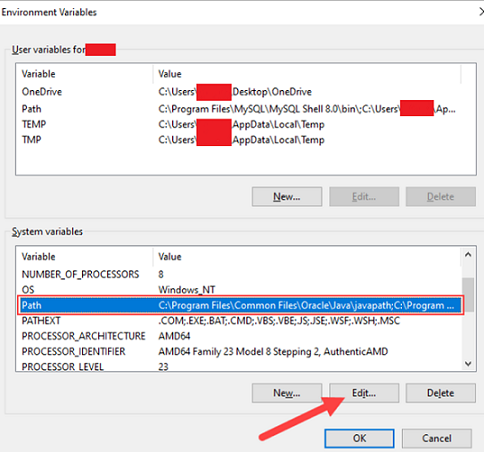 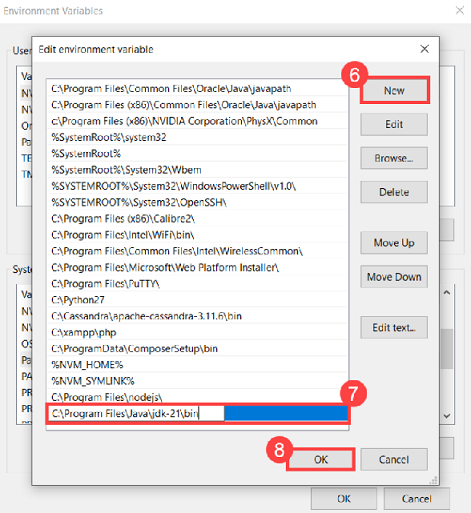 Step 2 : Add JAVA_HOME Variable Some applications require the JAVA_HOME variable to point to the JDK installation directory. Follow the steps below to create the variable:
  Confirm the changes by clicking OK in the Environment Variables and System properties windows. Test Java Installation :Verify that Java is installed by entering the java -version command in the command prompt: 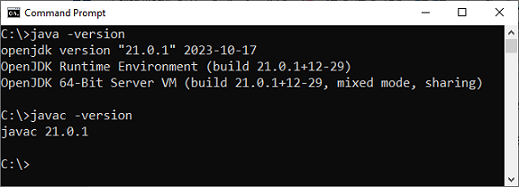 If installed correctly, the command outputs the Java version. To ensure everything works, write and compile a simple Java program by following the steps in the sections below. Step 1: Write Test_Java
    class Test_Java{
        public static void main(String args[]){
            System.out.println("Hello world!");
        }
    }
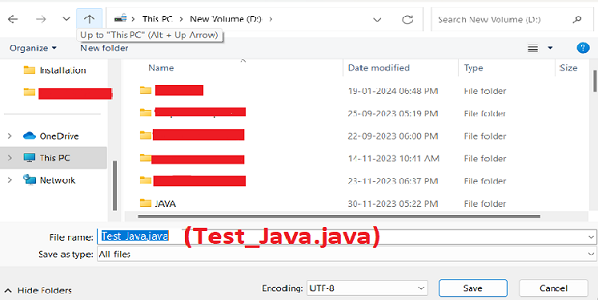 Note : When using Notepad, select All files for the Save as type option and add the .java extension to the file name. Step 2: Compile Test Java Script Access the Windows command prompt and complete the following steps:
javac Test_Java.java
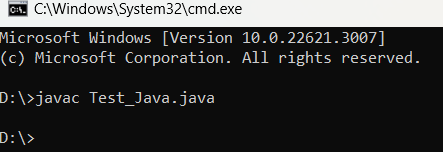 After a successful compilation, the program generates a .class file in the same directory. Run the program using the following syntax:
java Test_Java
The output shows that the program runs correctly, displaying the Hello world! message.
Conclusion :This tutorial showed how to install the Java Development Kit on a Windows system. ☛ Join to Learn from Experts: Java / J2EE Training in Chennai by TesDBAcademy
Next Topic »
(Installation - Eclipse IDE)
|